Mywifiext | Mywifiext.net Login | Netgear wifi Extender Login
Netgear has been trying to simplify the home connectivity experience ever since its inception with its reliable networking devices. To further simplify the process of extending and controlling your WiFi network, Mywifiext is an easy-to-use platform, simplifying the process of extending and managing your WiFi network. It is an essential part of this process since it provides a simple method to configure and manage your Netgear WiFi extenders.
With mywifiext.net login, users can easily navigate to the setup interface to be able to configure settings on their extender without any fuss. Through this portal, the mywifiext login setup is easy to do, even for non-technical people who want to strengthen their wireless coverage conveniently. Similarly, this guide gives you everything you need to extend your WiFi network and maximize connection coverage throughout your home or business premises. From Netgear extender login to mywifiext troubleshooting, you will cover everything in this guide!
About Mywifiext.net
Mywifiext is a local web address that allows us to configure and control Netgear Wi-Fi extenders. It does not represent a site on the internet but a unique address, which enables you to reach the setup wizard and the control panel of the extender using a web browser.
For all the Netgear extenders, you must navigate to the www.mywifiext or mywifiext.net 192.168.1.250 to access their web management interface. Further, you can log in or set up your Netgear range extenders using this web address. Apart from this, the http://mywifiext.net interface is also essential to enable control and set up the devices connected to your network.
Here is the outline of why it is needed:
Set Up Gateway:
Usually, the mywifiext.com serves as the gateway during the initial Netgear extender setup process. Additionally, it guides you through the steps to connect the extender to your primary router.
Central Dashboard:
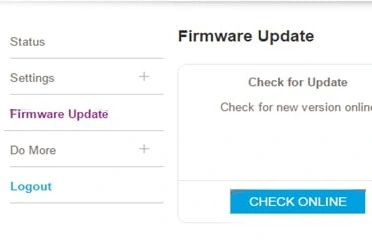
Once you have set up, you can log back into mywifiext.net to make any changes to the settings of your extender, review its connection status, and even update its firmware.
Troubleshooting Tool:
Moreover, the mywifiext.net control panel offers troubleshooting tools to aid you in fixing common problems and optimizing your extended network.
Getting Started: The Pre-Netgear Extender Setup Checklist
However, the mywifiext.net setup is easy and can be employed quickly under your command. You can set up these devices in mere minutes as they are installed instantly. There are different ways to install these devices, one of which is to enter the www.mywifiext.net admin page or by simply using the Netgear wifi extender setup assistant.
Nonetheless, you can use a wired or a wireless connection to complete the mywifiext new extender setup. Before heading for the mywifiext Netgear setup, you must complete the mywifiext net sign in. Here is how to log into the Netgear extender:
Accessing Mywifiext: Your Login and Setup Hub
Before navigating to Mywifiext.net, a little preparation can make the Netgear wifi extender login and setup smooth. First, unbox your Netgear range extender and locate its power cord. Additionally, it is worth ensuring that the device is connected to the WiFi of your Netgear extender. This connection is essential since the portal can only be accessed upon connection to an extender.
Moreover, it is important to have the default login details at hand. In case you forget to enter your login details, you can revert to the factory settings of the extender. Let us learn how to log into http://www.mywifiext.net or 192.168.1.250.
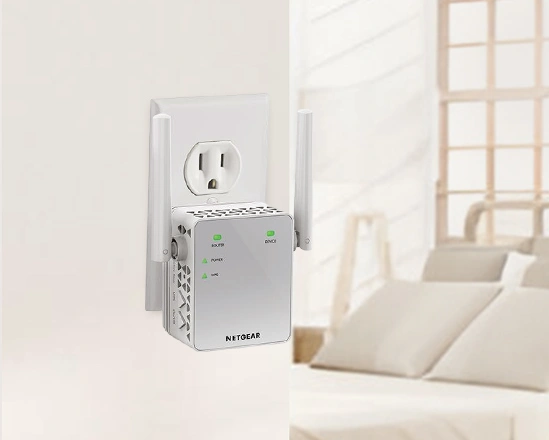
- First, place your range extender close to your Wi-Fi router to start the setup process.
- Then, plug in your Range extender into a power source.
- Wait for a solid green LED light on your Wireless Range Extender.
- Now, press the On/Off button on the device if the Power LED doesn’t light up.
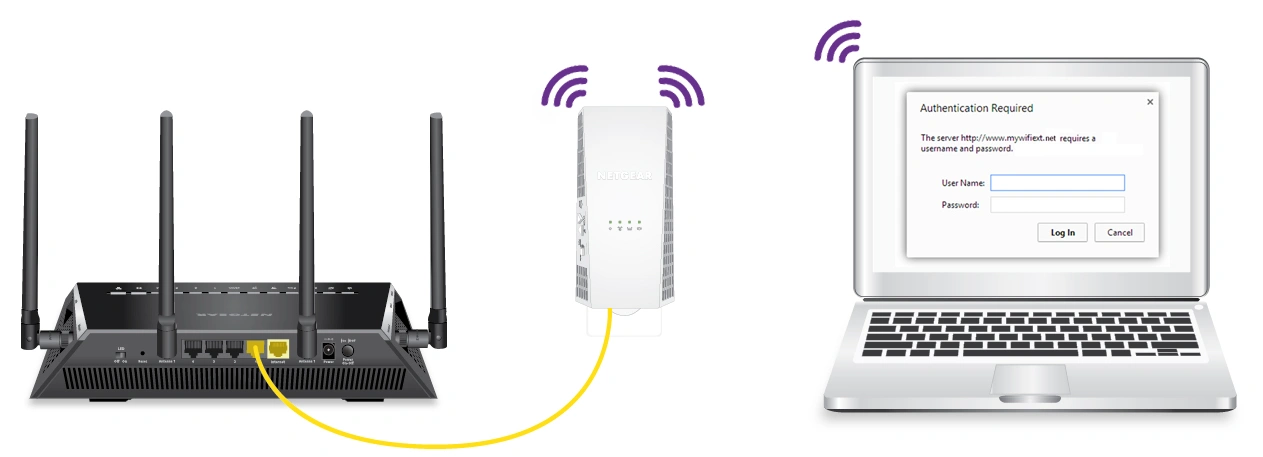
- Further, connect the PC with the extender using the wireless SSID of the device, or connect to the device using an Ethernet cable.
- Once the connection to the network has completed successfully, open a web browser.
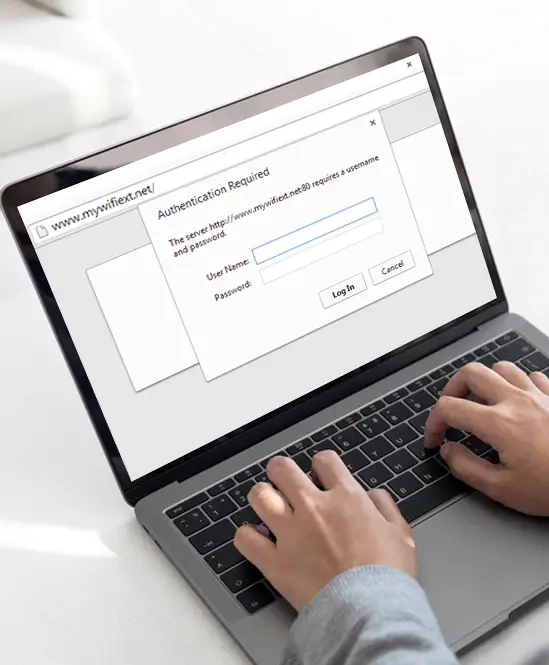
- Now, go to www.mywifiext.net admin page or navigate to 192.168.1.250.
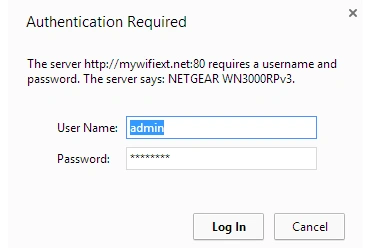
- Now, the mywifiext net sign in window appears on the screen.
- After that, enter your username and password in the login window.
- Finally, tap “Log In”, and you will be visiting the Netgear extender setup wizard.
How to Set Up My Netgear Range Extender?
Configuration of your Netgear range extender is a must in order to enhance WiFi coverage and remove dead zones within your home or office. A well-set-up extender gives a more powerful, faster, and stable wireless connection, making your devices always connected. There are various ways to configure your Netgear extender, and the options give you flexibility depending on how you want it and the network environment in which you need it.
Ways of Netgear Extender Setup
- With the Web Portal, mywifiext.net
- The WPS (Wi-Fi Protected Setup) Button Method
- Using the Netgear Nighthawk App
Regardless of whether you choose any of these methods, the user-friendly interface of the Netgear extenders allows you to complete the Netgear extender setup without any hassle. Let us now walk through the step-by-step setup procedure of the NETGEAR extender.
www.mywifiext.net Setup mywifiext.com setup On the Web
- Initially, make sure your existing device is connected to the internet.
- After that, plug your range extender into the same room as your wifi router.
- Wait till the range extender power LED stabilizes to green or blue.
- Now, connect your computer to the extender’s default network (NETGEAR_EXT).
- Next, launch any web browser on your device and go to mywifiext.com.
- Then, you will see the New extender setup page on your device screen.
- Hereon, accept the terms and conditions and further choose the admin username and password.
- Optionally, you can set security questions to add an extra layer of security to your device.
- Then, you will see the extender’s default SSID and password on the screen.
- You can customize these credentials as per your choice to secure your network.
- Now, connect to the new extended wifi network name.
- Wait until you see the LED indicators on your device turn solid green or blue.
- Next, unplug your range extender and plug it near your router and device.
- Finally, your Netgear extender starts expanding your wireless coverage.
Now, you have mastered the mywifiext Netgear setup process. So, start elevating your home internet experience through an extended wifi network.
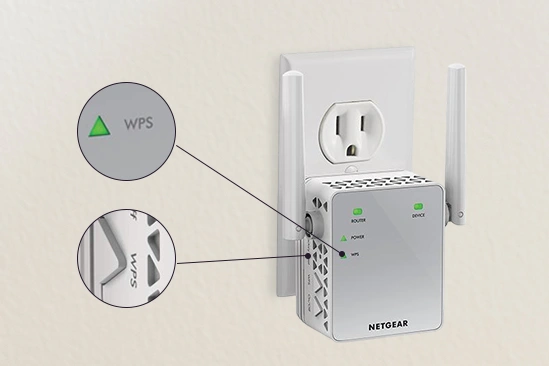
Accessing the Netgear extender setup wizard via the WPS Button
- In the beginning, set your device to the extender mode.
- Then, plug your device into a wall socket near the router.
- Now, wait till the power LED blinks or stabilizes.
- Next, press and hold the WPS button on the extender till you see the LED flash.
- Within the 2 minutes of pressing, hold the WPS button on your router too.
- When the internet LED on the router turns solid green or blue, release it.
- It indicates the device is successfully connected to the network.
- Now, unplug your extender and move it to an optimal location.
Netgear WiFi Extender Login On the Phone
- First of all, make sure your smartphone is connected to the home wifi network.
- Now, download the Netgear Nighthawk app on your device.
- Next, launch the app and go to the Menu button.
- Further, select “Set Up a New Nighthawk System” and tap “Get Started”.
- Then, choose your device as “Range Extender” and plug it closer to your router.
- After that, the Join Nighthawk network page opens, and the app detects your device.
- Now, follow the app prompts to connect your device to the wifi network.
- When your device connects to wifi, the “Personalize your settings” page opens.
- Tap “Next” and your Nighthawk app searches for the available wifi network.
- Hereon, select your current router’s wifi name and enter the password to connect to it.
- Wait for a few minutes, and the Nighthawk app will verify the Wi-Fi connection.
- Then, you will land on the “Set Up Administrator Login” page.
- Here, create your admin username and password to log into your Nighthawk app.
- If you want to keep your passwords secure and memorable, answer two security questions.
- If any firmware update appears, tap on “Update” and the app downloads the latest firmware version on your device.
- Lastly, unplug your range extender and reposition it near your router and the dead zone.
Where to Pace My NETGEAR Wi-Fi Range Extender After mywifiext net Setup?
The Netgear wireless range Extender should be placed halfway between your wireless router and your computer. However, it is important to notice that it must be within the wireless range of the wireless router before starting the Netgear range extender setup wizard. If you want to use a different location to place the extender, move the Extender next to the device, but the range of the router should still be within reach.
When there is a clear line of sight between the extender and the wireless router, you can expect the connection to be of the best quality. Usually, a clear line of sight is also recommended between the extender and the computer you are using to connect to the internet. Moreover, this straight path could be blocked by a thick wall or other materials. If that’s the case, move the extender to a different location.
However, your wireless router or access point defines the strength of your Range Extender for an internet connection. The extender does not receive internet access if:
- There is no internet connectivity in the wireless router or access point.
- If the wireless router or access point loses its internet settings.
- A wireless router or access point has its internet connectivity, not reaching the extender.
- The extender being out of range from the wireless router or access point could also be a source of the problem.
- If there are any physical obstructions and signal interferences in the network path.
Can’t Access www.mywifiext.net? Here is What to Do!
If you can’t connect to mywifiext.net or mywifiext.com, it is quite a common issue that users come across when they try to access the www.mywifiext.net setup wizard. Below are the top mywifiext troubleshooting tips & solutions to fix these issues:
Basic Checks
If you get stuck during the www.mywifiext.net new extender set up, make sure that you do the basic checks. The majority of the connection issues are solved by these troubleshooting tips:

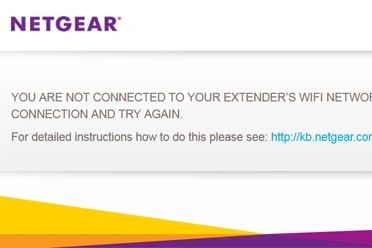
Ensure a Connection:
Initially, ensure your computer or phone is attached to your extender wifi network, not to your primary home network. Find a network name such as NETGEAR_EXT, or NETGEAR_2GEXT in your Wi-Fi list and connect to it.

Use a Different Address:
For the event that www.mywifiext.net does not work, attempt to utilize 192.168.1.250 instead as the address in the address bar of the browser. Moreover, you can use the mywifiext.com web address.
Browser Issues:
Sometimes, you Can’t Access www.mywifiext.net due to a faulty or incompatible browser. This may also be caused by a browser cache or settings. Therefore, you must try the mywifiext Netgear extender login on an alternative browser, such as Chrome, Firefox, or Safari.
Advanced Mywifiext Troubleshooting Tips:
If the simple steps do not help, then these are some of the other issues to check.
- Check the lights on the Extender: However, you must check your device LEDs carefully. When the extender lights are blinking or are amber, it indicates the presence of a problem. So, wait or retry till you see the solid green or blue LEDs.
- Power Cycle All: Often, power cycling is one of the most effective fixes to get rid of the temporary errors. So, disconnect your Wi-Fi extender connection from the power outlet. Wait a little time (about 30 seconds), then re-plug and try connecting again.
- Temporarily Disable Firewall or anti-virus: Sometimes, security software can lock you out of the setup page. A possible way to fix the problem is to turn off your computer firewall or antivirus applications to test that it works.
Still Can't Connect to mywifiext.net? Try Resetting!
In case the above mywifiext troubleshooting tips do not work, a factory reset should be the most likely way to make the connection work flawlessly once again.
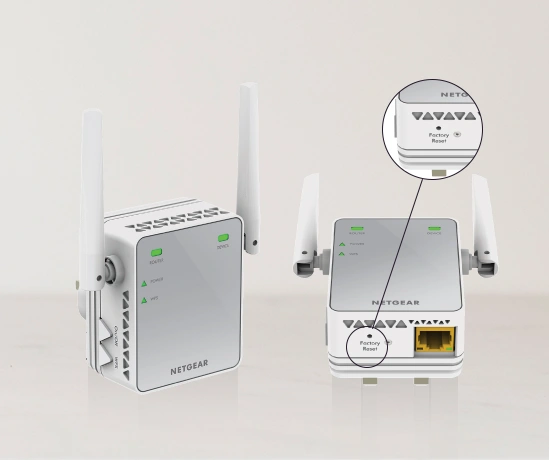
To reset the extender:
- First, it is necessary to power on your device.
- Then, find that small button at the back known as a reset button.
- Press and hold the button with a paper clip for 10-15 seconds.
- The lights of the extender will also blink, indicating that it is restoring to factory settings.
- Wait till the extender reboots and starts again with the LED indicators.
- You may now proceed with the mywifiext.com login.
Note: In case you have just run through all these steps and it has still not worked, you can contact our professionals through the live chat window.
In conclusion, from initial setup to advanced troubleshooting, having the right information can empower you to take full control of your home network via mywifiext.
FAQs
What credentials should I use to enter the Mywifiext net netgear wifi extender setup page (www.mywifiext.net)?
Usually, you can access the Netgear extender login interface via the default username as “admin” and password as “password”. Make sure both are in lower cases.
What can I do if the Installation setup asks me for my wireless password when I have entered the correct password?
If you place your range extender at the edge of your main WiFi router’s signal range, you will likely experience connectivity issues. The extender won’t receive a strong enough signal to effectively boost, causing weak or unstable internet in the extended area. Therefore, move your extender near the main WiFi router. This mostly resolves the current situation. While WEP security ensures that the wireless key is entered in the correct field.
Why is the mywifiext.net setup page not loading or responding?
If you are facing such issues, make sure your device connects to the extender’s temporary Wi-Fi network instead of your main router before accessing the Mywifiext web interface. If this doesn’t work, open your web browser and enter the IP address 192.168.1.250 to reach the extender’s setup page directly.
How to change the default Wi-Fi password of my Netgear extender?
To change the password, you have to log in to the administration panel of the extenders through the mywifiext.net page. After that, go to wireless settings to set a new password for the extended network.